After completing this lesson, you’ll be able to:
Like a normal FME transformer, a custom transformer has a number of input and output ports:
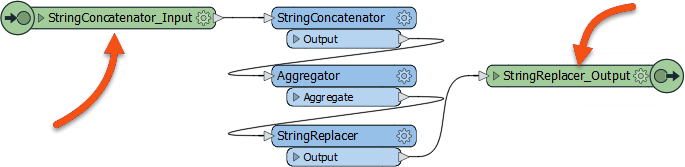
These input and output ports are defined by input/output objects in the custom transformer definition itself:
The first thing to know is that these input/output objects can be renamed, in order that the transformer ports get named appropriately. You can either double-click the object, choose Rename from the context menu, or press F2, in order to rename the object.
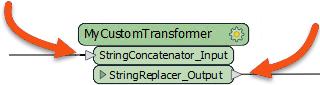
For example, here the user pressed F2 and renames the input port from StringConcatenator_Input to simply Input:

Renaming the input and output ports is useful for making the custom transformer intentions more explicit; for instance, helping the user to understand what data type is required as input.
For example, after editing the transformer might look like this:
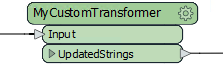
Here the user simply renamed the input port to Input. Renaming it to "Strings", "Lines", or "Raster" (for example) would help guide other users of the transformer as to what data is required.
However, they did rename the output port to illustrate the type of data that will emerge.
Besides renaming ports, it is also possible to add new ports to a custom transformer.
To do so simply select Transformer Input (or Output) from either the menubar or the canvas context (right-click) menu:
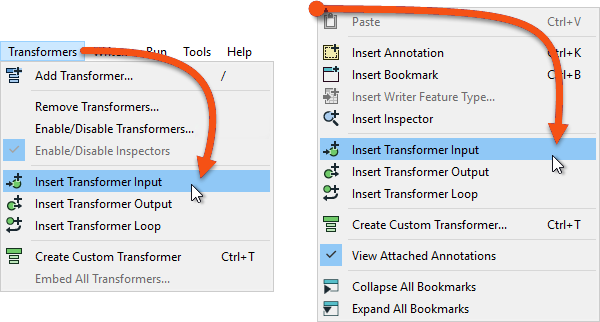
For example, here a user has ports to handle two streams of input data and two streams of output (one port for the required output, another that handles rejected features:
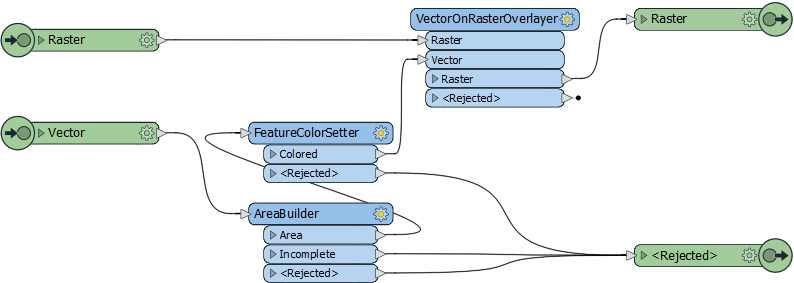
This means that each instance of the custom transformer has two input and two output ports:
You are continuing to work with your colleague who created a workspace that calculates the population density for neighborhoods in the city of Vancouver.
You turned their workspace into a custom transformer for reuse in the last exercise. Now you need to show how to use it multiple times and apply edits to its definition.
Open the starting workspace in FME Workbench (2023.2 or later).
Notice that we started with two ExpressionEvaluators and now have one ExpressionEvaluator and one custom transformer. Let's place another instance of the custom transformer in place of the ExpressionEvaluator.
Click on the ExpressionEvaluator_2011 and press the delete key to delete it.
Click on the DensityEvaluator custom transformer and press Ctrl+D (or right-click > Duplicate) to create a duplicate copy of it. This is the same effect as placing a new instance, but quicker. You could do the same task through Quick Add or the Transformer Gallery if you desired.
Connect the second DensityEvaluator into the workflow, in parallel and not in series:
By creating a second instance of the custom transformer we've started to re-use our content, which is great. However, the second instance is currently processing the wrong data.
Inspect the parameters for DensityEvaluator_2 and set the population parameter to TotalPopulation2011 (not 2001):

Run the workspace and inspect the output to ensure the data is being processed correctly.
One obvious problem with the output from the transformer is that the result is put into an attribute called PopulationDensity2001, regardless of what data is being processed.
This is not useful; for example, the 2011 results also get the same name, as would any other scenario where we used this transformer. We should improve this by making the output name more generic.
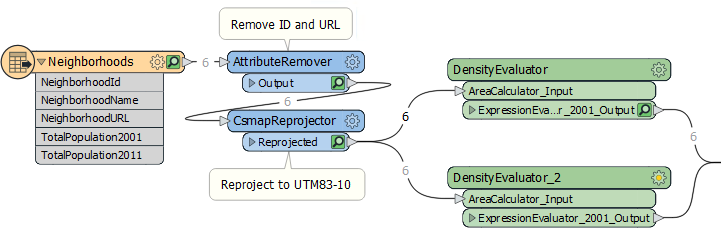
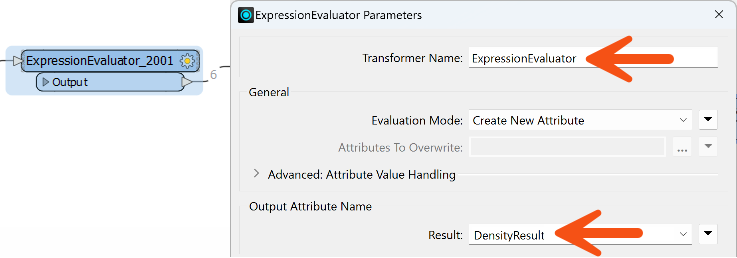
Click on the tab labeled DensityEvaluator to switch the canvas to the custom transformer definition. Inspect the ExpressionEvaluator_2001 parameters. Change the Transformer name to ExpressionEvaluator since we are processing more than just 2001 data. Then change the name of the Result parameter to DensityResult:
If you run the workspace again (run it from at least the custom transformer onwards) you’ll notice that DensityResult is the attribute output by both instances of the custom transformer; i.e., one edit has fixed both of them!
We should also change the custom transformer's port names. At the moment they are not very elegant.
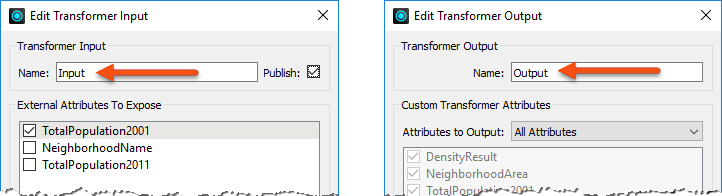
Back within the DensityEvaluator tab, click the cogwheel icon of the input port object (currently labeled AreaCalculator_Input). Inspect its parameters and change the Transformer Input Name to Input.
Now repeat the process for the output port object, renaming Transformer Output Name to Output:
Click the Main tab to check back on the main canvas and confirm the changes have been made:

You'll need to manually resize the transformers to fit their new naming style, as in the above image.
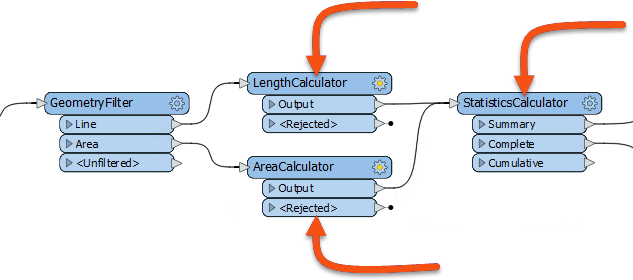
You'll need this image to answer the first quiz question.